.jpg)
 Right folks. This is an article about the movement phase. Definitely the most important phase of WHFB. This is where your games will be won and lost. Yeah, big talk. Big decisions. As a note, this is the phase that differs most from 40k, of the big 3.
So, movement. Huh, well, I'm gonna need to break this down. For now, we'll cover remaining moves. "Remaining moves? Isn't that a weird place to start?"
Not really, it's where the majority of your movement will be done to be honest. So, what is the remaining move phase? Well, if it's not a charge, a flee or a doomwheel (or the like) then this is when it will move. This is the phase for general, all inclusive, utility movement.
So let's cover the basics.
THE MOVE
Your unit moves up to it's movement characteristic in a straight line. See, this stuff isn't so hard. This is a tactic commonly employed by armies like WoC and Orcs and Goblins.
THE WHEEL
This was a revolutionary invention, allowing units that otherwise had to struggle with square movements to get about in a much easier manner. This is when you keep one front corner of a unit still, and move the other. Erm, the rulebook explains it better. Basically if you're tilting to a slight angle, you'll be doing this. It's commonly used to get into position when marching up to the enemy to pound his face into the back of his skull.
THE MARCH
This is something your troops can do all the time (unless they're a war machine or chariot). It doubles your movement. You, like I say, can always do this unless you're within 8" of an enemy or a flyer, in which case you need to pass a leadership test. You can combine this with the wheel, but not the reform, or the swift reform. An interesting note. If you attempt to march within 8" of an enemy and fail your LD test you count as marching. Even if you then elect to not bother moving. Also, if the enemy unit within 8" is fleeing it doesn't impede marching.
THE REFORM
This is when you turn a unit about on its centre point to face any direction. Basically a pivot. But in addition, while doing one you can change the ranks to any formation you wish. Like I say, you have to keep the centre point the same. In addition, none of your models can move more than twice their movement stat. No reforming across the table for you sir! This is what you do after combat is engaged, either that or you do it swiftly. Since swift reform became available, I rarely find myself performing a reform. Which brings us nicely to this;
THE SWIFT REFORM
Ah, one of my favourite rules in 8th edition. It's very very underused. what this does is, if you have a musician and pass a leadership test, allows you to make a reform and then still move. In addition, you can shoot. "Shit batman, does that mean my handgunners can do this?" No, you count as moving sadly. However it does mean troops like, i dunno, Dark Elf crossbowmen can. In addition, take the army TheLieutenant played against myself with in my battlereport. He played in his big blocks. He should have marched up in units 2 ranks deep (so 10 wide), and as he got close, swift reformed back into position? Why? It reduces the number of template hits I do to him. Very nice rule, very underused. Be the guy that uses it.
Ok, so now we know the basics of movement.
Putting them into practice however... Well, we're gonna talk about something very near and dear to my heart. Redirection, blocking, general irritation, whatever you wanna call it.
REDIRECTION
This changed in 8th edition. It changed a lot. First I'll outline what used to happen. You have your big, nasty, stupendously powerful unit. Let's call it Killsaw. Killsaw can go through your army like a chainsaw going through an egg. However you have a cheap unit that costs you 2% of your overall army cost. Let's call it Clive. What you used to do is place Clive at an angle so that Killsaw couldn't move forward past Clive, and it had to charge Clive. Clive would flee out of range and Killsaw would be left high and dry. Clive was usually fast cavalry, so could constantly do this.
However, in the current edition Killsaw can take a leadership test to charge a new eligible target, which makes redirects a little harder, in that you have to do it the hard way. You have to hold, then they either turn around or overrun. You need to make it so that both options put them in an irritating place to be. For example, in my battle report against High Elves I had it so that if he overran he'd be out of position, but if he reformed I could just run another redirector in at an awkward angle, which would pull him (very slowly) out of position.
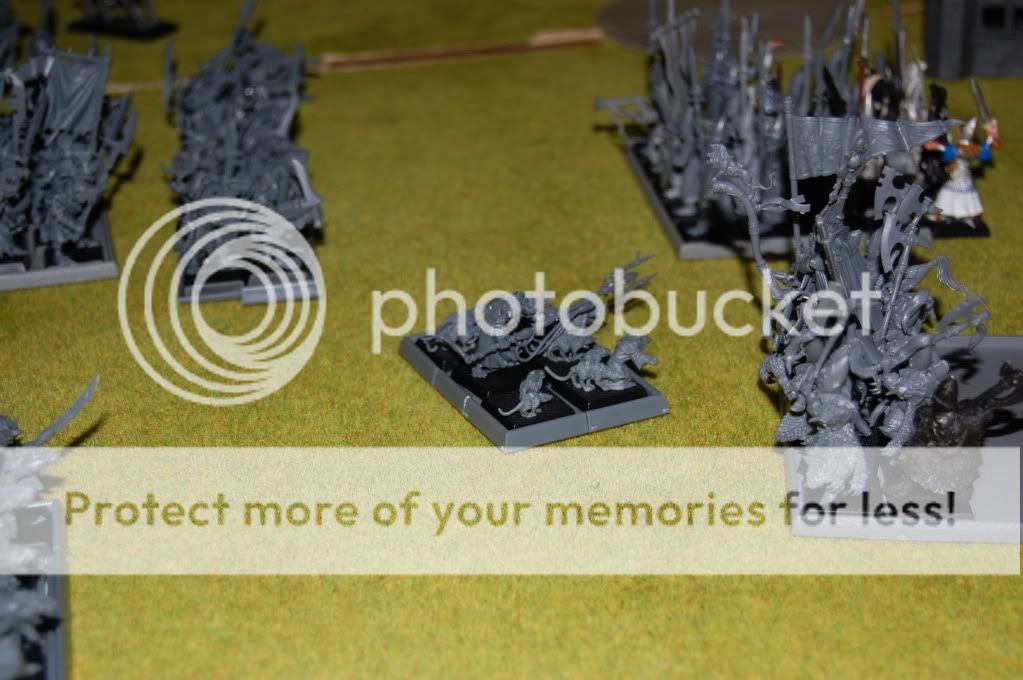 |
| Here we see the rats pulling the White Lions out of position into the slaves. Either that or out in the open for shooting. |
Other options include putting your redirector at an angle so that if they don't overrun they get flank charged, regardless of what way they face. Basically, these days, it just buys you a turn of movement, sometimes more. It's a great thing to do in a shooty army, and I'd advise they should all take quite a few redirection units. Another way to do redirection, and this requires more resources, but against deathstars it's viable. You need to make it so that the only option they have after combat is overrunning. It's doable, especially if your redirector can fly or is a skirmisher. After that you need a second redirector 6.1" behind your first redirector. So they charge, kill redirector 1, and overrun into redirector 2. Buying you another turn. Like I say, it's not always preferably, but there can be times it's advantageous.
You'll notice I said 6.1". This brings us nicely to the bad of redirection. Panic. Yeah, it screws my army over big time. What's the problem? Well if a unit (i.e. your redirector) is destroyed in combat (which it should be) then all your units within 6" need to take a panic check. Now with a general and BSB nearby it's not too big a deal, but it's still inconvenient. Especially if your general gets dwellers'd. But for most armies this isn't a problem at all, as LD7 and LD8 is the standard. Not my army's LD5.
Hope this gives you guys an insight into movement in WHFB. There will be more to come, I barely got started.
Hope you guys enjoyed the article.
Wow. You're exceedingly clear, direct, and effective in describing these phases. I completely and totally understood "The Wheel" even with your "erm". Again, I don't play WHFB so this is a pretty darn good accomplishment!
ReplyDeleteThis is exactly the sort of stuff I would like to see. I've no idea how to really play WHFB so articles like this help immensely.
ReplyDeleteOnce again Billy, this is exactly what I need =]
ReplyDeleteLet's not tell them about the last time you said that though. At least not in public.
ReplyDeleteThanks for the positive feedback folks! I assure you there's more to come. (:
Did you know that you can create short links with AdFly and make $$$$$ from every click on your short links.
ReplyDelete